Heads Up: This is a gross oversimplification of how it works. It's enough to get you going, but you should still read up on it and understand it in detail.

SSH is short for Secure Shell. The most commonly used SSH server on Linux is called. Luckily, unless you're truly building a server from scratch, OpenSSH is probably bundled on your local machine and remote server. If it's not, a simple should help you get started on that front. Open SSH is awesome because it allows for Public and Private Key Pairing. Public and Private Key Pairing can be used for all sorts of stuff.
Some common examples include, plain-old encryption, server authentication, and Git authentication. Key Pairs work by having two keys: a Public and a Private Key. The Private Key is not meant to be shared anywhere but the computer it is on (if it be the private key of your local laptop or the private key of a remote server).
- First it confirms where you want to save the key (.ssh/id_rsa), and then it asks twice for a passphrase, which you can leave empty if you don’t want to type a password when you use the key.However, if you do use a password, make sure to add the -o option; it saves the private key in a format that is more resistant to brute-force password cracking than is the default format.
- Using MAC and internal Enterprise GitHub We use password protected SSH keys for access to our repos GitHub Desktop is not allowing me to attach my personal public key in order to push to my repo.
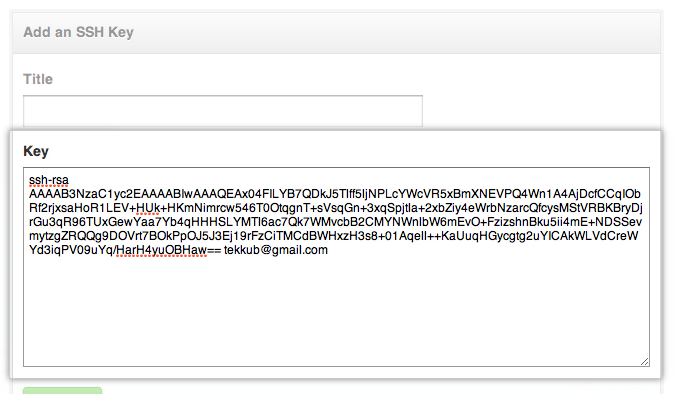
On Mac OS X, ssh-agent will “forget” this key, once it gets restarted during reboots. Frustrating, but easy enough to resolve. Because I couldn’t remember how to add the key, I tracked down the Github guide on setting up SSH keys.
The Public Key, however, is intended to be put on any other computer/server you would like to pair the private key with. You can put the public key on as many different computers or servers as you would like. Here's an example to help explain: By looking at the above chart you'll notice a few things. ' Your Laptop' has its Public Key on Digital Ocean, Linode, and GitHub.
This means that if Your Laptop communicates with these servers, its Private Key will sign and authenticate with the Public Key. Once this happens, Your Laptop is now authenticated and verified to be given access. This authentication can only occur one-way, meaning that although Your Laptop can access Digital Ocean, Linode, and Github, they won't be able to access Your Laptop from the pairing. Lastly, you'll also notice that Key Pairing has been setup with the Linode server and Github as well.
This is a brief and general explanation. I definitely advise anyone interested in learning more specifically how it works to read up on it more than my laymen terms explanation. Here's some more sources:. Public Key Authentication versus Password Authentication In terms of security, this is somewhat hotly debated. They're both secure methods, but which one offers more protection is generally the topic of debate.

The answer to this is it really just comes down to how much you trust the users. It's assumed by most that the a user won't remember or cannot be trusted enough to use a secure password. This means it's probably safer to use key-pair authentication.
Some server admins will even recommend disabling password authentication. The main issue with this though is that if the user's computer gets compromised, they're essentially losing their key to multiple servers (needing to reset the key-pair for each one). Here's an awesome excerpt by that helps explain the issue: It's kind of like this. I am divorced and have a vitriolic ex wife. I also have three great boys, who like most boys, can be forgetful, lose things, as well as love their mom. When my boys got old enough to need a key to my house, I had a decision to make.
Do I put a key'ed lock or one of those numeric key pads. If I put the key'ed lock it was certain that my sons would regularly be losing keys, I would be getting calls to come home from work to let them in, and there was a big possibility I would have to replace the lock or have it re-keyed from time-to-time because well, the number of 'lost keys' (or probability my vitriolic ex wife now possessed one) reached an uncomfortable limit.
The numeric lock on the other hand, while not maybe the safest in the world, I had no concerns about the keys being lost, I could text my son's the combo from work (without coming home) when they forgot it), and I could periodically change it when I felt it was compromised. I also could decided how long and/or complex I wanted it. If I thought my ex had it, I could change it as well. A lot simpler and less total cost of ownership. The key'ed lock is like PK. The numeric lock is like passwords. In the end, I can tell you, I am a lot safer with the numeric lock, because I choose my own destiny and can do so as dynamically as I want.
And remember, the reality is, that is just one way into my house. Tek Tengu on Stackoverflow.com6 Generating Your SSH Keys Check for Existing Keys The first step is to check to see if you have any existing keys setup. To do this open up your terminal and type: cd /.ssh ls -al Or, in one beautiful line: ls -al /.ssh If you see idrsa and idrsa.pub, it means your computer already has a Public and Private Key setup.
Password Protected Ssh Key For Github For Mac
If it doesn't, you'll need to run this command: ssh-keygen -t rsa -C 'your-email-here' Then just press enter all the way through. We're skipping over creating a passphrase.
Password Protected Ssh Key For Github For Mac Free
If you want to learn more about this, you can head over to GitHub. They have of this. Now if you run: ls -al /.ssh You'll see that you have both a idrsa and idrsa.pub file now. You'll most likely never touch the Private Key ( idrsa). Then, made obvious by the name, idrsa.pub is your machine's Public Key which you can now put on other computers/servers you want to pair with. Making Sure the Remote Server is Ready for Public Keys So now that we have our Private and Public Keys setup, we'll need to copy the Public Keys to the remote server we want to be paired with.
There are multiple ways to do this, but, first, we need to make sure everything is setup on correctly on the remote server. SSH into the remote server and run this same command. Ls -al /.ssh If there is no.ssh folder in your Home directory, you'll need to create one. You can either do this manually or just follow the steps from above on generating an SSH Key to automatically have it create the folder. Once it is created, you'll need to create an authorizedkeys file. Here's how you can do it from the command line: cd /.ssh touch authorizedkeys Now if you run ls -al /.ssh you'll see an authorizedkeys file. The next step is to make sure that permissions are setup correctly for this file and its parent folder.
Simply run these commands: chmod 700 /.ssh chmod 600 /.ssh/authorizedkeys Or, in one beautiful command: chmod 700 /.ssh && chmod 600 /.ssh/authorizedkeys That's it! The remote server is now ready to have Public Keys put on it. Each line of the authorizedkeys file is for a Public Key. So you'll paste your Public Key on Line 1. If you have another Public Key for a different user, paste it on Line 2 directly below it.
Copying Public Keys to a Remote Server Copying and pasting to a remote server isn't always as easy as it sounds. Here's some methods on how to do it: Old-Fashioned Copying and Pasting You could technically just open up the authorizedkeys file with an editor that has remote access and paste the Public Key in the authorizedkeys file. Alternatively, if you're using iTerm on a Mac, you could just copy-and-paste the key through the terminal using Vim, Vi, or Nano CLI editors. If you're on a Mac, you can run this command to copy your Public Key to your clipboard: pbcopy.ssh/authorizedkeys' You should have been prompted with a password for the server, enter it, and you are done. Pretty simple and slick way of doing this. If you open up the authorizedkeys file on the remote server, you'll now see your Public Key copied over there.
You'll also notice that now when you SSH into your server you won't be prompted with a password at all. You've just successfully setup Public-Key authentication with SSH! Create SSH Shortcuts At this point, we've obtained a basic understanding of Key Pairing and Public-Private Key Authentication. We're also now able to SSH into our servers without a password. The last thing I would like to share is setting up SSH shortcuts. If you're managing sites across many different servers, it's hard to keep track of all the different username/passwords, IP Address, and hostnames.
There's a way to create shortcuts for all your sites. For example, you can create a shortcut that's as simple as this: ssh scotch Setting this up is quite easy. On your local machine (your laptop), navigation to the ssh folder and create a file called config. Here's how to do it from the command line: cd /.ssh touch config Next, you can create shortcuts inside of this file. The format looks just like this: Host scotch HostName scotch.io User nick Host example2 HostName example.com User root Host myclient HostName 64.233.160.0 User user2ab1 Host myotherclient HostName 64.233.160.0 User userxyz123 Port 56000 Host amazon HostName ec2.amazon.com User ec2-user123 Port 12345 IdentityFile /path/to/special/privatekey/amazon.pem Now, if can simply type these commands to SSH into those respective servers: ssh scotch ssh example2 ssh myclient ssh myotherclient ssh amazon Wrap-Up So that's it! I'm sure a lot of you already do this, but I know when this was first shown to me it was super helpful.
Not all of us have a deep experience with servers and know this. This is only intended as a quick tutorial to get your foot in the door. So, I encourage you to read up on it and learn more than this article explains. I hope you enjoyed the read!